Adding clients
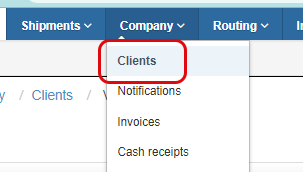
To manage the clients you work with, go to the Company>Clients.
- Managing the Clients page
The Clients page has contains the list of all your clients, with an extensive filtering tool on top of it.
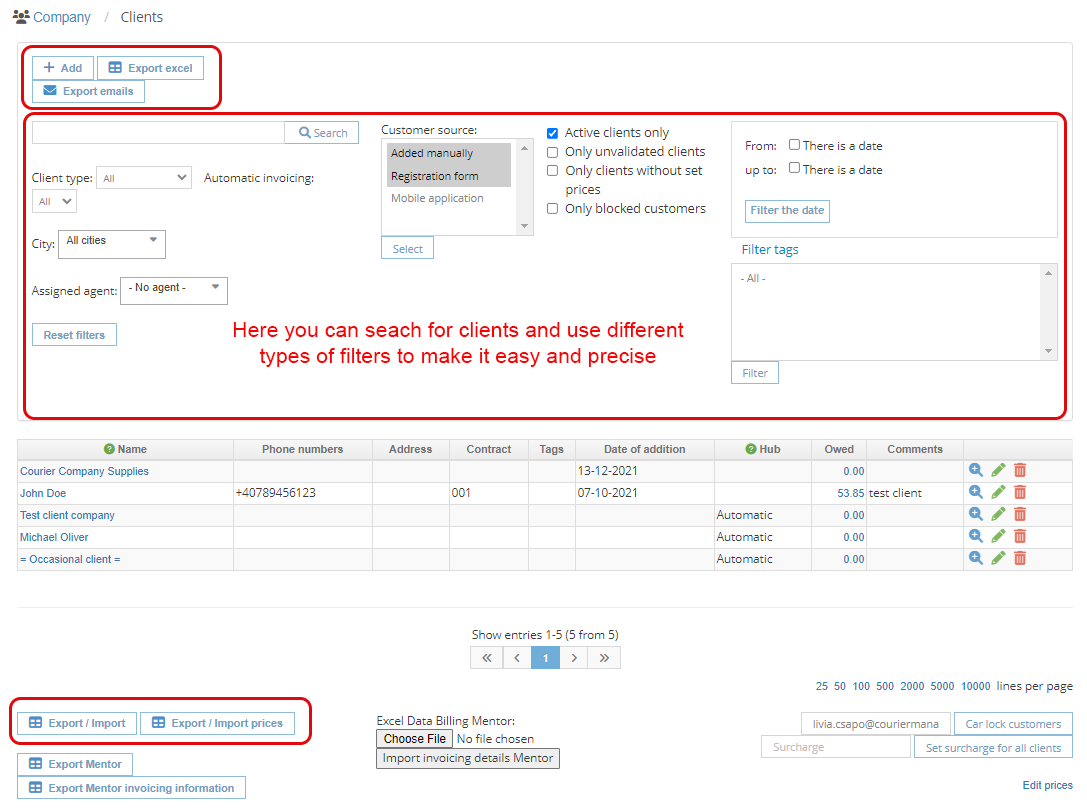
You can search a client by the name, or use any of the filters to narrow your search: whether they’re a private person or a company, if they have automatic invoicing or not, if they have one of your employees assigned to them or not, and so on. By default, the box Active clients only is active, but you can check or uncheck any of the other boxes. When you create clients, you can set up different tags of your choice with them, and you can also filter them through tags as well.
This page also allows you to import and export all sorts of information related to your clients.
For example, the Export excel button at the top, allows you to export a simplified list of all your clients

The Export emails button opens a page with the whole list of emails from your clients, separated by comma, that you can then copy and paste to a document of your choice.
On the bottom of the page, you have the Export/Import button, which allows you to easily add (and save later, if you wish) a big list of clients, with very detailed information. The Excel sheet has over 50 columns that you can fill in with whatever interest you about your client (from addresses and invoicing info, to tax information and assigned hub/agent, contracts, or other specific facts related to their account).
Next to the Export/import button, there is Export/Import prices. This allows you to download (and later upload) a .csv file with detailed information on the prices each client has for each type of service or zone.
As with most Export/Import buttons on our website, utilize Export first to use as a model, and then Import, to upload the information to the software.
A pop-up window prompts you to either Import or Export.
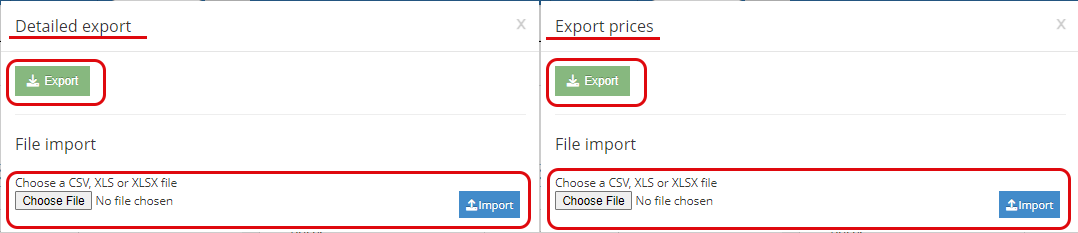
The Mentor export/import buttons underneath are to be used only if you use that specific accounting software.
On the bottom right of the page, there are two fields you can fill in.
The Set surcharge for all clients lets you add a percentage to all pricing applied to all of your clients. Let’s say the price of gas has suddenly increased, and you want to add a 5% to your pricing, in order to avoid losses. This is the easier and fastest way to do it, without having to change manually all types of pricing.
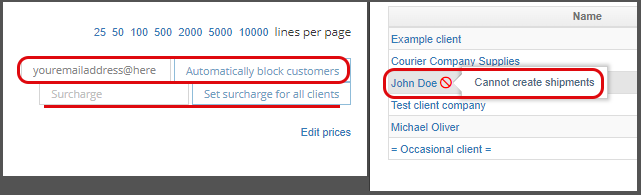
Automatically block customers allows you to stop clients from creating new shipments if they are late paying the invoices you issued, and unblocking those that did pay and are now up-to-date. You fill in your email address, click on the button and once the process is finished (it may take a while if you have a lot of clients), you will receive an email with a list of clients that have been blocked and unblocked.
When a client is blocked, in the Clients list, you can easily see them, since they have a red “prohibition” sign next to their name. You can always manually unblock a client by clicking on their name, and then on the Activate addition of shipments button on top of the left table.
- Creating an account for a new client
To add a new client, click on +Add. In the new page, you can fill in the information you need. You just need to hover over the small question mark icons, and you will be able to see what each field is about. If you don’t see the green icons, you activate them by clicking on the green button with a question mark on the top right of the screen.
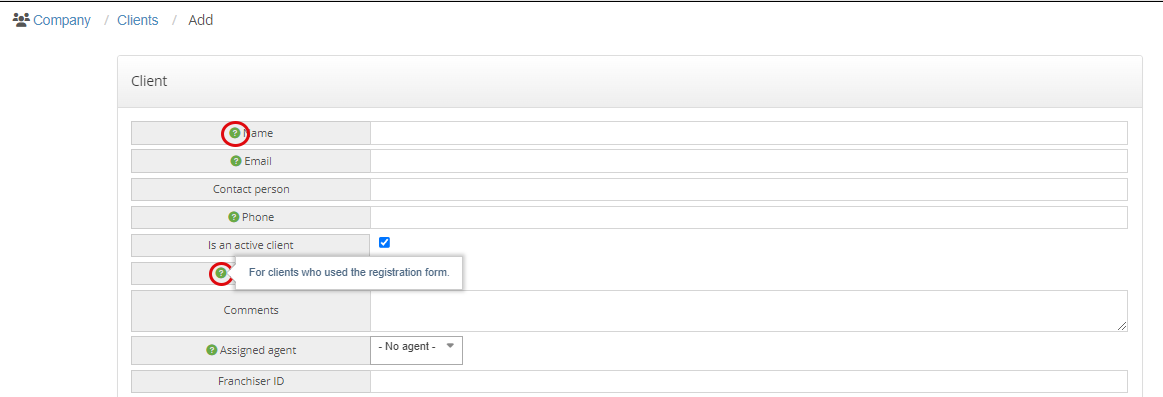
All the information you can fill in regarding the client is divided into six distinct categories: Client general information, CoD, Invoicing, Invoicing data, Sender address and Fixed address return funds.
Here are some of the most used fields:
- Assigned agent - is used to calculate sales commissions based on a percentage of the income received from this client.
- Fixed sender address - by checking this, the client can always use the sender address that you can define a bit below.
- Initial pickup status - it can be either Requested or On hold. If it is Requested (this is the default setting), the courier can come pick up the shipment as soon as the order has been submitted. When the status is On hold, the courier comes to pick it up only when the client specifically requests that.
- There are several notification options you can use with your clients: check the SMS delivery activated box to be able to send short messages. With it, in the field right underneath, you can write the brand name of your client that will be use in the SMS, instead of their actual company name. For sending emails, choose your option from the next field, Mail delivery enabled. The default is not to send emails to clients.
And don't forget to save your changes by clicking the OK button at the bottom.
On the next page on the left side, you can see all the information regarding your client (that you can always modify, by clicking on Change), and on the right side you can add or change a few important things, such as adding specific notifications for that client, creating departments (useful when they have different pickup points), users and API keys for them (if your client is a company and has several employees using the CourierManager account, you will want to create separate users for them). You can also add attachments to the client, internal notes, or add tags, that can later ease the process of searching/filtering through your clients, and see the list of their unpaid invoices.
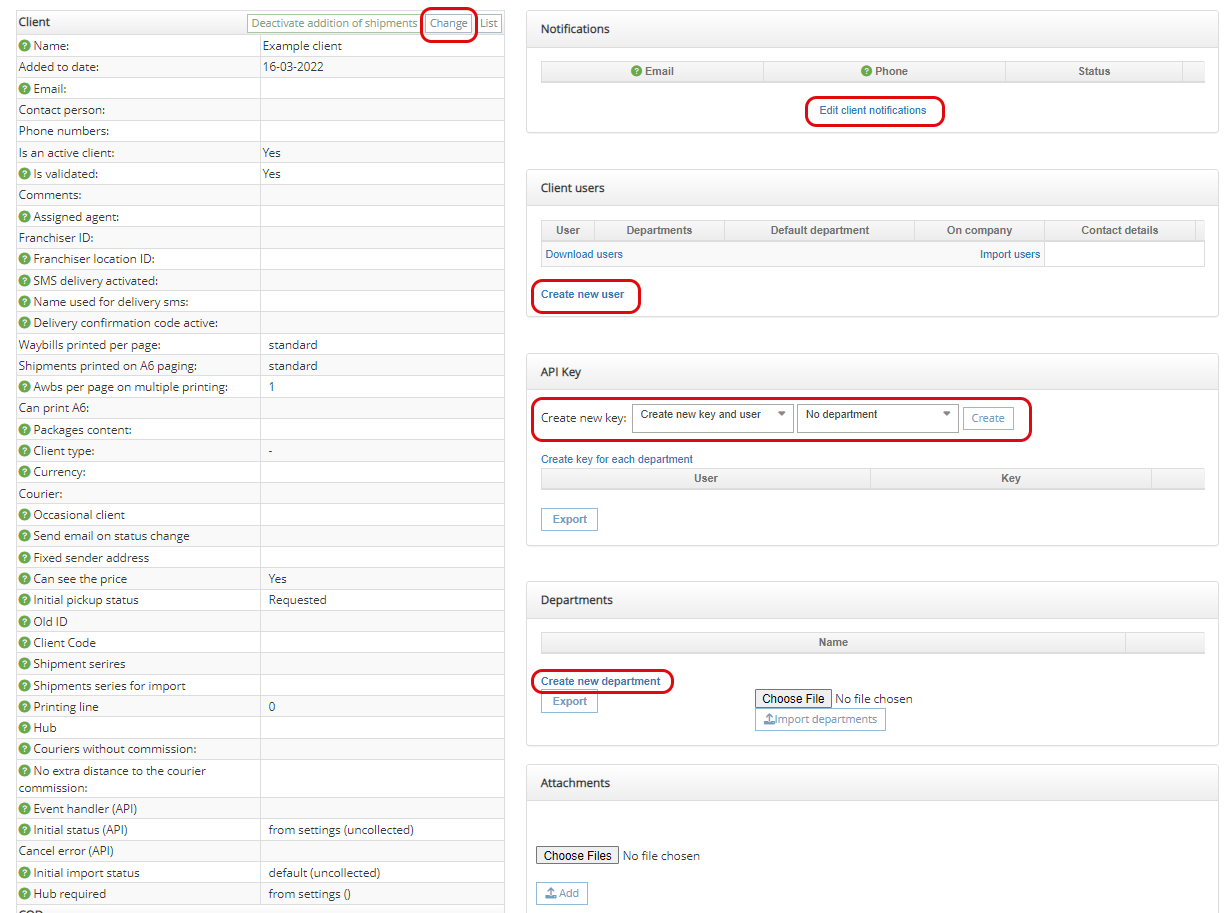
You can always get to this page from the Clients menu, by clicking on their name in the client list.
Now that you know how to create and manage a client, here is how you Set up your prices.